Monday, October 27, 2014

I Bought New Glasses!

I have really been wanting a pair of prescription sunglasses for a while. I tend to only wear my glasses if I'm not leaving the house, because I really depend on sunglasses on those sunny days. So, I splurged and got myself my very first pair of prescription sunglasses as well as a new pair of sexy librarian glasses (since my prescription changed a little. I want to keep up to date, ya know?!).

Since I never throw anything away (not in a "hoarding" way, more like in a "lazy" way), I still have several old pairs of glasses. And after I make this post, I'm going to donate them to some local veterans association that collects old glasses for whatever reason. They have a donation box at the grocery store I patronize. (And if any of you folks out there have some old glasses you'd like to donate, stop procrastinating like me and get on it!!!)

Before I do my charitable work for the day, here are some pictures of me looking fabulous in all my glasses!!

Terrible picture, but this is me, 21ish yrs old. It's the oldest picture of me in glasses I could find.


I started wearing glasses at 10 years old. During my childhood and teen years, I'd worn several pairs of glasses, but those are long gone! And I hated them so much that I only wore them at school, so I don't even think I have pictures of me wearing glasses as a kid. Oh well. The oldest pair I have are these:

These are too small for my head, but they're dark blue and I loved them for a long time.


I probably got them in 2003-2004, not sure. I bought them after my brothers dog ate the only pair I had. All my previous pairs were super nerdy looking and these were my first cute pair that I didn't mind wearing in public.

I ended up wearing those for a long time. I replaced them in 2010 or so with another pair (pictured below), that I gave to my mom, so she could get them fitted with new lenses for herself, which she never did. Those ones were very similar. They were black with little white squiggly details around the edges.

After a while, they became askew and then I had to replace them!

I got sick of the thick, dark frames so my next pair, I opted for a more sleek look:

Me and Milla cat, my sweet little snuggle baby!


I got these in 2012. They were so comfortable and I loved them so much, that the following year, 2013, I went back and got the same exact pair, this time in pink.


This is what I look like when I'm cooking. Just kidding, I usually have higher heels on!! Lol


I go back and forth with these two pairs. They're the only ones I still regularly wear.

So, that brings us to the present, 2014. When I went to the eye doctor this year, I told myself, I'm only going to get prescription sunglasses. They're expensive and I already have a couple pairs of perfectly fine glasses. And then my doctor was all like, "Hey, your eyeballs got a little better and for the first time in about 10 years, you're going to have a different prescription!" Way to burst my bubble, Doc. At least he didn't say my eyes got worse.

After having an inner argument with myself (for all of 37 seconds) as to whether I should get a new pair of regular glasses, too, I went over and picked out a pair or frames I liked.


Probably my cheapest pair of glasses ever!

They were mad cheap and very similar to a few of my old glasses, but not as plain. I love the tortoiseshell, that doesn't photograph very well.. I tried on a few of the trendier pairs, but they weren't doing it for me.

And this is me torturing Mitchell.. uhh.. I mean making Mitchell giggle by dangling him upside down!


And that brings us to the main reason for my excitement: My first pair of prescription sunglasses! I have kind of a weird shaped head/face, so I have trouble finding glasses/sunglasses that don't make me look like Sloth from "The Goonies." I also ended up at a glasses place that had a very small selection of sunglass frames, but, I was able to find a pair that I liked.

Everything from the thrift store except my awesome sunglasses!

They had them in teal or pink. I went with pink because, well, I'm not adventurous and I like pink.

I don't think I'll be taking them to the beach, but they'll be good enough for driving or possibly taking walks in the summer. And who knows, maybe I'll become someone that wears glasses more than contacts. If I do, at least I'll be stylin'.
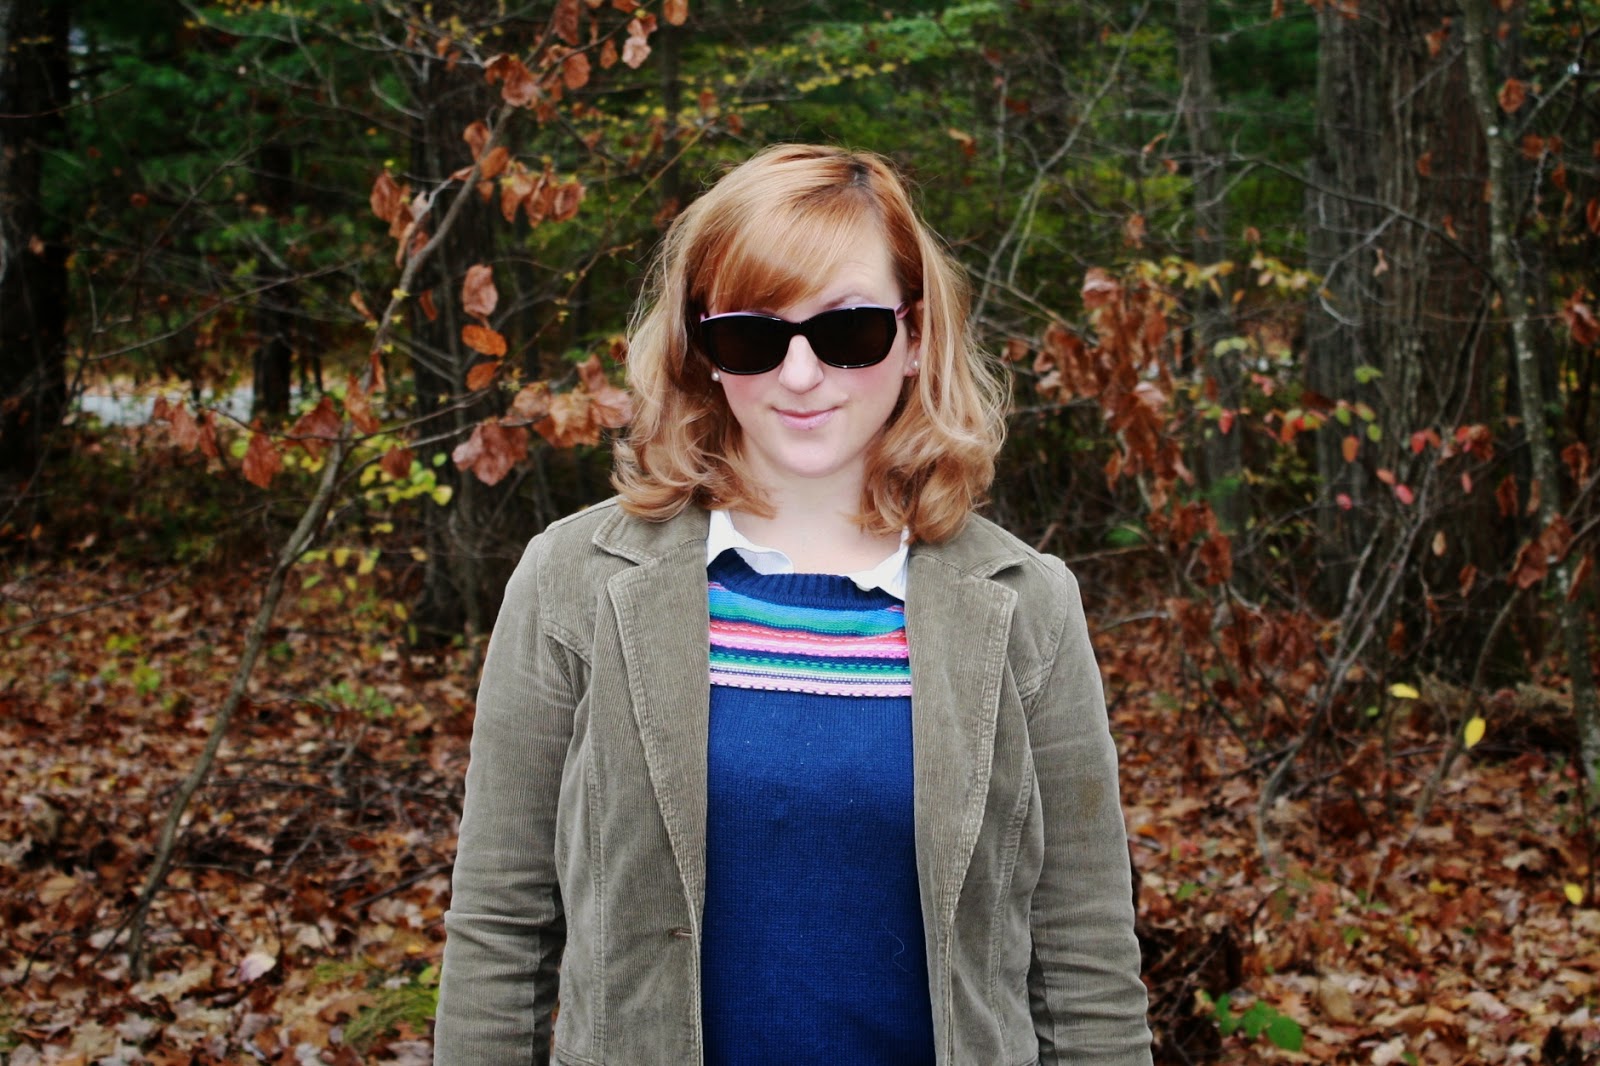

Even though I might seem like an old person with my prescription sunglasses, I know I rule!

Sunday, October 26, 2014

Jill Can Cook: Cheesy Potato Breakfast Casserole

Usually, Joe is out the door before the kids and I even wake up in the morning and the kids and I usually get up and go in a rush, so our weekday breakfasts usually consist of granola bars, frozen waffles, or cereal. And sometimes on the weekends, we're so busy as a family, we don't have time to make a big breakfast, so we revert to our weekday routine. But I really love the weekends that we have no schedule to keep, so we can do whatever we want, whenever we want. On those mornings, we like to put on a big breakfast of several of the following: sausage, bacon, eggs, toast, home fries, pancakes, home made waffles, etc.

Just to switch it up, I specifically sought out some breakfast recipes, to keep our lazy weekend mornings fresh. I found this recipe from Doughmesstic. Like usual, I had to cut this in half and change it slightly, due to the fact that I had some odd amounts of some of the ingredients.


Cheesy Potato Breakfast Casserole

No actual brand names. That's how cheap I am.
Ingredients
  • 3/4  lb breakfast sausage, cooked (we used maple flavored!)
  • 1/2 yellow onion, chopped, sauteed in sausage grease
  • 3 eggs
  • 1/4 cup milk
  • 10 ounce bag frozen diced hash browns
  • 6 ounces grated mild cheddar cheese
  • Salt & Pepper, to taste
Directions:
  1. Preheat oven to 350.  Spray medium casserole dish (we used 9 x 13) with non-stick spray.  Set aside.
  2. Prepare sausage and onions.
  3. Set aside half the amount of cheese.
  4. In a large mixing bowl, combine all ingredients, including sausage and onions.  Pour into prepared casserole dish. 
  5. Bake for 35 minutes.  Remove from oven and top with reserved cheese.  Return to oven for 8 minutes.
  6. Allow casserole to rest for 10-15 minutes.  Serve and enjoy!

I chose to cut the onions REALLY small because I hate onion texture even though I LOVE the flavor

All the ingredients before I mixed them together. It already looked very delicious.

Before it went in the oven.

And after it came out!! The house smelled really enticing!!


The best thing about this casserole is that it's so versatile. You can easily change out the breakfast sausage for ham or bacon, or maybe even a combo of both. Maybe you make twice the amount of casserole and make half of it with bacon and the other half with sausage. Maybe you prefer meatless and make it with veggies instead. Maybe you want it be a part of your dinner, so you use ground beef/chicken or hot sausage. Just think of all the possibilities!


Quinn approves!!


I also love how versatile it is on it's own. It can be it's own meal as it is, but I bet it would be great served as a side dish along with some yummy over easy eggs and toast. Or, as I hope to do next time I make it, throw a serving into tortillas so Joe can heat them up in the morning for a quick delicious on-the-go breakfast.


Mitchell approves, too!!


It's not tough to make, but there is a fairly decent amount of prep time involved, so to really make it worth it, I think I'll make a double batch from now on. I think we'd all benefit from having something a little heartier for breakfast other than granola bars.


Joe loved it!!


I loved it as evidenced by the very ladylike bite I took!!

Joe's first helping immediately followed by a second.

I know I have (and probably will a lot in the future) tell you guys to make this, but really, you should make it!  And when you make it, make it your own!! Whatever you do, let me know how it turns out! I'd love to hear other ways to make this more yummy!


Thursday, October 23, 2014

Jill Can Cook: Cinnamon Sugar Donut Muffins

Don't you hate it when you're going through your pins and realize that you've saved a couple of the same exact recipe but from different sources.? Yeah? Me, too. And not only did I save several of the same recipe, but it seemed eerily familiar. They reminded me of a recipe I used to make in my formative years, called "Donut Muffins," from an old cookbook my mom has. In fact, it's not even a real cookbook. It's like some collection of recipes held together by metal rings and string. Very informal, not bought at a store. I'm getting off track, but you get the point. This recipe is obviously very sought after and lots of blogs seem to be cooking it...

So, what to do, what to do?! I'm not making these recipes up on my own. I'm just following other recipes I'm finding. So, who do I give the credit to? I followed the recipe back to the earliest post I could find (at Velvet Lava; I changed it slightly) and have decided, that's who's going to get credit for this one. Sorry everyone else who's blogged about these! I'd give credit to my original recipe, but that "book" is hiding in a box or closet somewhere. So, here it is:

Cinnamon Sugar Donut Muffins


Ingredients
1/3 cup butter, softened
1/2 cup sugar
1 egg
1 1/2 cup all purpose flour
1 1/2 teaspoon baking powder
1/2 teaspoon salt
1/4 teaspoon nutmeg
1/3 cup milk

Topping (option: cut topping in half*)
1/4 cup sugar
1/4 cup butter, melted
1/2 teaspoon cinnamon

Directions:
Preheat oven to 350F.
In a medium-large bowl, mix together all dry ingredients.
In another bowl, beat together butter, sugar and egg.
Add dry ingredients to the butter mixture, alternating with milk. Combine until mixed.
Scoop batter into muffin tins (or mini muffin tins in my case) that have been sprayed with cooking spray. If filled 2/3 full, should yield about 24 mini muffins
Bake for 18-21 minutes, or until they just start to turn a bit golden at the edges.
Allow to cool slightly before next step.

For the topping, mix sugar and cinnamon in a small bowl. Place melted butter in another small bowl. Dip the warm muffins in melted butter (you can dip just the top, but it's even tastier to dip the whole muffin!), then dip/roll the muffin in cinnamon sugar.

The bowl of wet ingredients and dry ingredients, just about ready to be mixed together with the milk.

The batter after everything's mixed together. It's nice and thick.

I've been sick the last couple of days so I've pretty much fallen behind on every house duty that I have, especially the dishes. So, once I got my two little mini muffin pans in the oven, I decided to tackle my mound of dirty pots and pans.

Here's a before shot. That's not even half of it!

I quickly ran out of room in my dish rack!

I finished up the dishes just as the timer was about to go off. Just in the nick of time!

Since I'd spent the better part of an hour blowing my kids off to cook and clean, I decided I'd let Quinn put the finishing touches on the muffins by dipping them into butter and sugar/cinnamon.

She did a really good job!

I had to help a little. even though she did a good job, she was very slow!!

They taste just as good as they look! I promise!

A close up of the little delicious muffins.

Once these were made, I snuck a little bite and knew for sure that this is the recipe I used to make as a kid. Now that I think of it though, the originals might've had allspice as opposed to nutmeg, but they taste nearly exactly the same!!

The kids loved them, too!!

Nom, nom, nom!!!

A little too much excitement in your smile, Quinn. Tone it down a bit, Daughter!!

I suggest all you people in blog reading land make this as soon as humanly possible! So easy, so delicious, and so worth it!! (And they still taste delicious even if you skip the last step of dipping them in butter/sugar/cinnamon!)


Tuesday, October 21, 2014

DIY: Patterned Dress Into Patterned Skirt.

 
After the fiasco that was my last refashion (remember those lovely tan pants that I "Texas Chainsaw Massacred?"), I decided for my next project I'd do something ridiculously easy, just to get my mojo back. I chose this dress:

Where did my neck go?! I swear I have one!

I bought it several years ago from Family Dollar. It was $3.00, I think. Possibly $4.00. It was so long ago that I'm not sure. Anyway, I bought it without trying it on (huge no-no!!). It ended up fitting me so terribly that it just hung in my closet. I'd take it out once or twice in the summer months, decide I hated it, and throw it back in my closet.

Could I have found a less flattering dress for myself or what?!

It had an empire waist that is sometimes flattering on my figure, but with the plunging neckline, billowy skirt, huge armholes, and weird "sleeves" it just wasn't doing me any favors. Plus, there's that awkwardly placed yellow diamond pattern thing that covers my belly button like a bulls-eye! Not cool.

Quinn's toy cheerleading pom-poms are taking over my workspace!

All the offending parts of this dress are in the top portion, so I just cut that part off, above the elastic waistband.

Still using black thread, even though it doesn't quite match, because I am *that* scared of rethreading it!

I folded over my raw edge and sewed it up. That's it. That's all this dress needed. I threw around the idea of cutting below the elastic waistband and making a new waistband hidey-hole to put the elastic band back into. All that, just to make it a little shorter because the original waist fit right under my boobs and pushing it down to my actual waist would make it kinda long. I knew I wasn't going to make it any shorter by cutting/hemming the bottom since it had that cool pattern on the bottom. But I decided to go the easy route. When wearing it, I figured I could just hike it up (or down) in order to get the length I wanted on the skirt. This is what I was left with:

The yellow shoes were a recent thrift store find, too!

I am pretty pleased with my new skirt. With being able to pair the super busy pattern of the skirt with a plain top, I don't feel like it's too overwhelming. It adds just enough interest.

This is the end of my "Bend and Snap!"

I ended up with an item of clothing I would actually wear! I am only a little bummed out that it took me until mid-fall to refashion this blatantly summer dress. So, back in my closet it goes, but it's coming out the first nice day next year! I never thought I'd be excited to wear it!

I love how my leg looks broken in these photos! That's why I paired them together!

Sunday, October 19, 2014

Jill Can Cook: "Easy" Apple Crisp

I bet you all were wondering when I'd make something out of my million pounds of apples that Joe and the kids picked. Considering that almost every recipe containing apples included 30 hours of peeling and cutting, I needed to wait for a day that wasn't filled up with other nonsense. Lucky for you, I found some time!

While Joe caught up on last weeks football game and Mitchell ran around the living room screaming with delight, I made apple crisp as Quinn stood next to me giving me her little kid play by play on my every move.
 
I used to have a really good and easy apple crisp recipe, but I couldn't find it anywhere. So, after checking out Pinterest, I found this recipe, from A Family Feast's Apple Crisp, that seemed pretty similar. I ended up cutting it in half with a few tweaks (as shown below).

I had small apples, so I used more than needed
 
 
Ingredients
    For the Apples:
  • 5-6 large apples, peeled, cored and sliced
  • 6 tablespoons sugar
  • 1 tablespoon flour
  • 1/2 teaspoon cinnamon
  • 1/8 teaspoon nutmeg
  • 1/8 teaspoon salt
  •  
    For the Topping:
  • 1/2 cup flour
  • 1/2 cup brown sugar
  • 1/3 cup oats
  • 1/4 cup butter (half a stick) cut into 1-inch pieces
  • ice cream or whipped cream, for serving
Instructions
  1. Preheat the oven to 375 degrees. Spray a large casserole dish or 9x13-inch glass baking dish with non-stick cooking spray.
  2. In a large bowl, combine the apple slices, sugar, flour, cinnamon, nutmeg and salt. Toss to coat the apples and transfer to the prepared baking dish.
  3. To make the topping, combine the flour, brown sugar and oats in a medium bowl. Add the butter pieces, and with your fingers, rub the butter in the mixture until it resembles coarse crumbs. Sprinkle this mixture over the apples.
  4. Bake for 35 to 40 minutes or until the topping is crisp and golden and the inside is warm and bubbly.
  5. Let sit for about 30 minutes before serving with ice cream/whipped cream
Quinn kept me company and never stopped talking the entire time!
 
I cut the recipe in half and I still ended up with more than our family could possible eat!!
 
So delicious with the whipped cream topping!
 
Joe enjoyed a nice big bowls worth! He almost went back for seconds!
 
I also enjoyed a big bowls worth, too!
 
Quinn ended up not liking the apples. She only ate the whipped cream and crispy topping. Oh well. Mitchell didn't have any interest as he was too busy running around, getting his energy out. Since we ended up with more than Joe or I could eat without getting sick of it, so I had him bring the rest to share with his coworkers. I hope they like it!
 
We went grocery shopping this weekend and got some stuff for a few new recipes I think our family will enjoy. I can't wait to get back in the kitchen!
 

Wednesday, October 15, 2014

Jill Can Cook: "Easy" Coconut Macaroons!


I'm always on the look out for recipes that not only taste great, but are ridiculously easy. It's a bonus if I can find recipes to use up ingredients that I may have wasted otherwise. I bought some sweetened coconut flakes not too long ago in order to make a coconut cream pie (that came out great, btw) and I had some coconut flakes left over. This put me on the look out for something to use them up. Cue this recipe I found (The Comfort Cooking). Let's hope this comes out ok!


I even wrote this recipe out on a recipe card!! I didn't want to run the risk of not having a hard copy.

Ingredients:

1 1/3 cups flaked sweetened coconut
1/3 cup granulated sugar
2 tablespoons all-purpose flour
2 egg whites
1/2 teaspoon vanilla extract

Directions:

Preheat oven to 325 degrees F.
In a medium bowl, whisk egg whites until airy.
Add sugar, flour, and vanilla extract.
Add coconut. Mix until coconut is evenly coated.
Drop by heaping 1/2 tablespoonfuls onto a baking sheet lined with parchment paper.
Bake for 18-20 minutes, or until golden brown. Let macaroons cool for 2 minutes before removing to a wire rack.

So, this was the first time in a long time that I had to separate egg whites/yolks. Even though I can't remember the last time I did it, I am certain that I did the ol' blob the yolk from one half of the shell to the other until all the white falls off. I wanted to feel like a real chef today so blobbed that egg into my hand and let the whites fall out. Let me just say, this was the absolute weirdest feeling in the universe. I implore all of you to do this at least once in your life! You'll never forget it!


And did I mention that I did not screw it up?! Heck yeah, I rule!


Hmm.. Looking a little boring, macaroons. Let's get you more interesting.

After I mixed everything together, I decided the batter didn't look all that appetizing. I wanted my kids to eat this stuff because I am trying not to gain weight (no, I'm not dieting. I'm just trying not to stuff delicious food into my mouth all the time!). I needed a gimmick. I needed this to look like candy. I had the perfect idea!!

Spider mix sprinkles!!! Yum!!

I recently purchased some Halloween themed sprinkles so I could make cookies for a Halloween party I'm going to and figured I could spare some for these macaroons. As soon as I poured some in, and took a very flattering selfie, I patted myself on the back for my ingenuity.

 
I probably should've brushed her hair, but I was too busy making macaroons!

I was right. they were a hit! Both kids loved them. The only small issue was that the sprinkles had big spider shaped sprinkles that melted into black puddles. Oh well, Quinn thought it was chocolate chips. Maybe next time, I'll use different sprinkles. Anyway, They were chewy, moist, and a little crunchy. They weren't too sweet. They weren't bland. They were just right!

Happy Halloween from my blog of terrible food pictures!!


Monday, October 13, 2014

The Weekly Recap!

 
Mitchell's 18 Month Doctor Appointment:

He was only happy while sitting/rolling on the floor. Gross.

This marks the end of multiple check-ups for the kids per year. Mitchell will go back to the doctors again when he's 2 yrs old and from then on, it will be yearly! Thank goodness! Between the doctors appointments, eye doctors, dentists, etc., for the kids as well as myself, we tend to see medical professionals at least once a month! P.S. He's 32.5 inches tall and weighs just about 24 lbs.

Joe Went Apple Picking With The Kids:

I just love their faces!! They are so expressive.

Nothing too exciting here. Picked one apple, picked 'em all, ya know?! It's only worth mentioning because there's very rarely an occasion that Joe is with the kids and I'm not there. I had some plans of my own (see below) and Joe was invited to pick apples with our kids and his family.

First of all, everyone had fun. Quinn regaled me with plenty of cute stories when they got home. Secondly, Joe took 218 pictures. All I said was, "take plenty of pictures so I can feel guilty about missing it." He thought he took about 100-120. It really does sneak up on you! (not many came out that great, unfortunately). And lastly, they ate so much food that day! They were gone for 4ish hours and during that time ate apples, apple cider, apple donuts, and ice cream. This does not include all the other food they ate that day!

I Was Feeling A Little Under The Weather:

Aww.. I'm so lucky!

I wasn't sick really, but I had a bit of a headache one day during the week. I guess Joe felt bad for me and wanted to cheer me up, so he bought me flowers! Our cats eat roses, so he got very few of those. I loved them all.

I Went To A Penny Sale:


At least someone likes the prize I won.

My grandmothers church was having a penny sale. My mom, sisters, Memere, and I all went and spent some money on tickets. My Memere and mom got skunked, my sister won a couple items, and I won this "Welcome Friends" sign and brass apple candle thing. I deemed it too lame to keep in my house, so I lovingly gave it to my mom since she likes lame things. I assured her that I would still get her a Christmas present, so she was happy.

We Went To Some Thrift Stores:

Either I'm artsy-fartsy or dorky-forky. You decide.

I go thrifting with my mom every week, sometimes multiple times per week. I don't always find stuff to take home with me but sometimes, like today, I really luck out! I found these awesome burgundy platform heels (Jessica Simpson brand!! Like new condition!!). They fit me perfectly and only cost $2.50! I had to have them. Also, I am always on the look out for books. I love reading and one can never have too many books waiting to be read. I never expect to find any newer releases so I was pleasantly surprised to find "Revenge Wears Prada," the sequel to "The Devil Wears Prada." I also love Chuck Palahniuk, so to find a book of his I haven't read yet was also quite awesome!!