Monday, March 14, 2016

Finished Projects: Accent Wall.. With Stencils!

Several months ago a craft store near my house closed down. Initially, the news closing of the most easily accessible craft store near me was devastating. That is, until I realized that there'd be a mega huge sale before they closed down! I haven't mentioned it before, but a lot of the new crafty items I've been showing off in my blog posts lately, like my pinking shears, have come from the sale.

Had it not been for this amazing sale, I probably would never have thought to pick up big wall-sized stencils. They're normally $20 per design (and some places online sell them for more than double that)! So, when the craft store was selling them at 50% off, you know I stocked up.

I knew right away that I wanted to use one set to paint an accent wall in Quinn's room. I've been saving it so it could be her birthday present. I wanted it to be special for her. And I lucked out in that the set I bought her came with 2 sets of wall stencils in it: A big polka dot stencil and a stencil of half a dozen small polka dots.

I love the look on Mitchell's face! Haha

Ok, so in case you didn't know: this is what Quinn's room currently looks like. It's pretty boring on this side of the room. It's just her bed and one little thing hanging on the wall. I've always planned to do something eye-catching on this wall, so it's purposefully blank. (And possibly, I'm just a little cheap when it comes to decorating!)

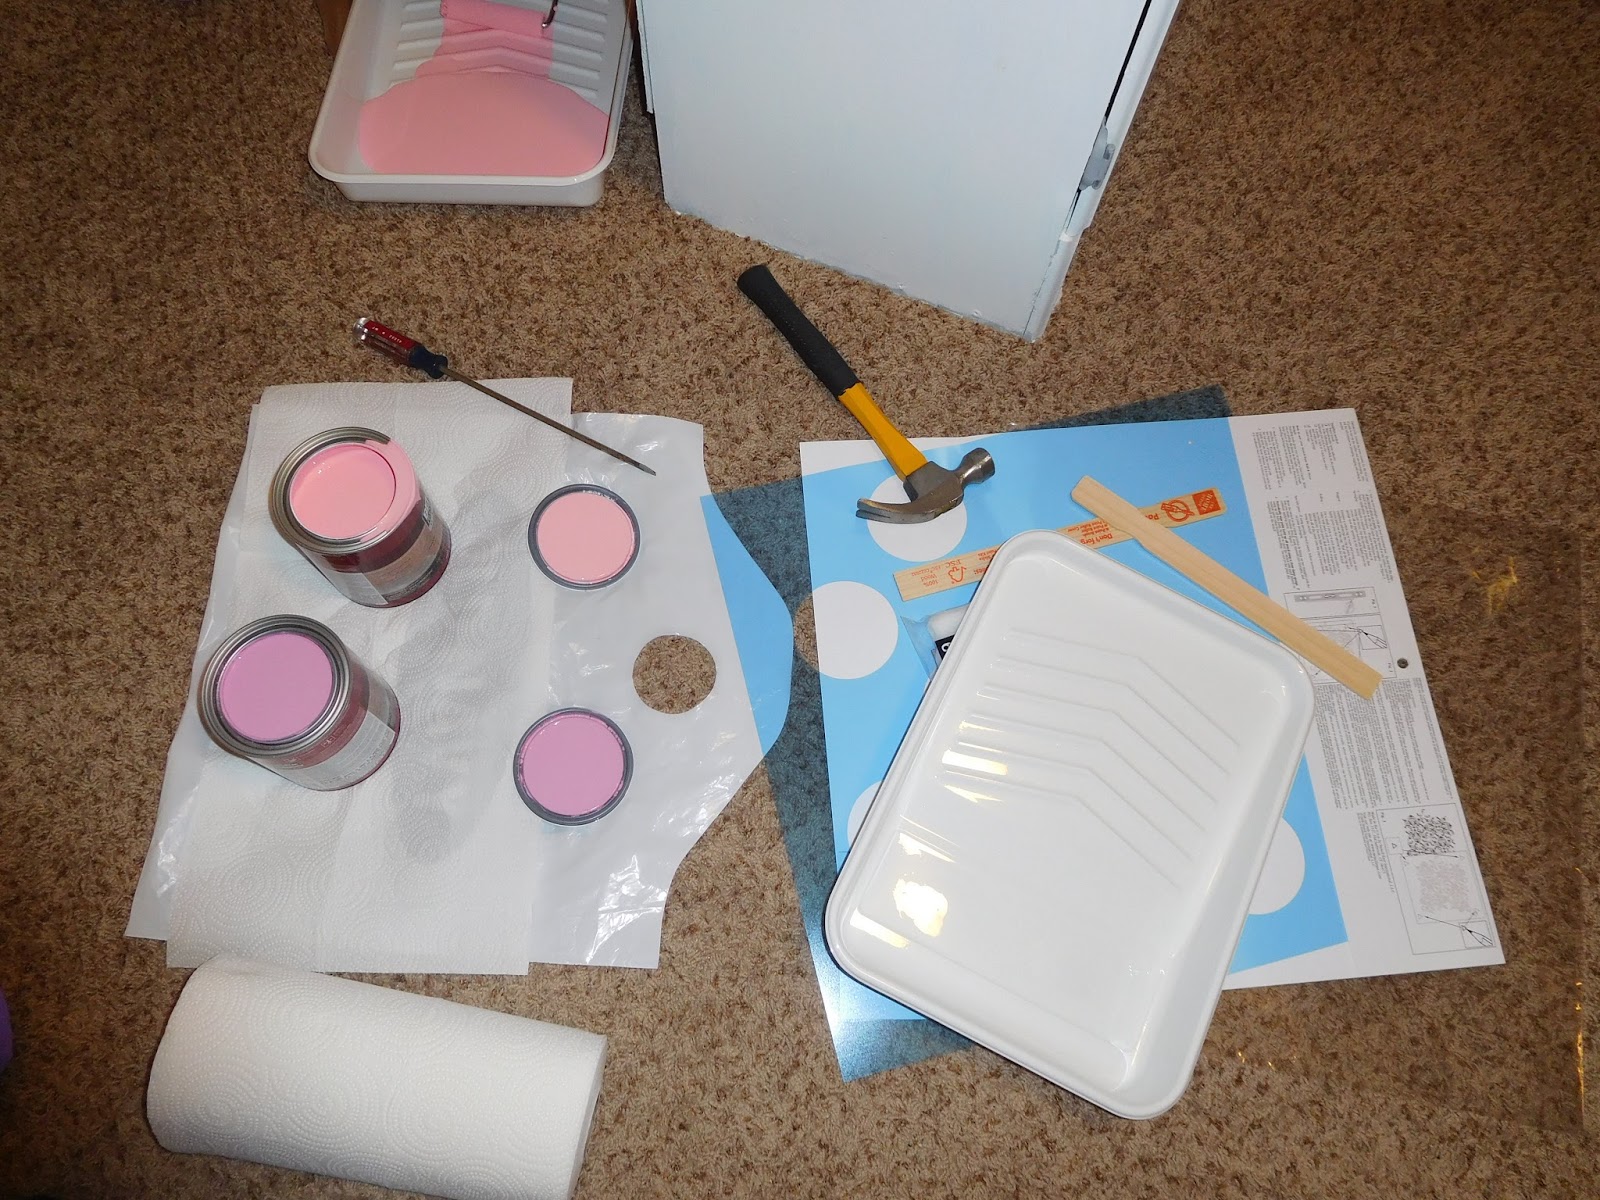
Some of my supplies.

I didn't really take a lot of pictures of the supplies or the process. Luckily I took this measly picture of some of my stuff. I picked out a small can of pink paint and a small can of purple paint.

I used painters tape to tape to tape the stencil to the wall and without a real plan, just started placing the dots and painting.

First dot down. A million to go. 

The kids were dying to help...

Ehh, what the heck, it's her room. I might as well let her paint a dot!

I couldn't just let Quinn have all the fun so Mitch got a turn, too.
After the kids had a turn, I took over so this wouldn't take all day. I painted, I think 5 big pink dots and then I painted a ton of a little pink dots..

It looks a lot more vibrant in person.
I probably should've waited to replace the stencil in between dots, because a few drips of paint got on the underside and made little marks on the wall. I'll have to go back over them with the yellow paint at some point. So keep that in mind, folks, DON'T rush or you'll just make more work for yourself!!

Anyway, I moved on to the purple. And that's it. Even with my slow kids helping, I managed to get this whole thing done in about an hour and a half, including set up and clean up!

The finished product.
I probably should've mapped out the dots a little better, but I like how it's really random.

And as a bonus surprise, when the wall dried and I pushed the furniture back to where it went, it looked like this:

It looks like I planned it out perfectly!!

Quinn was really happy with how it turned out.

My flash is killing the pigment!! AHHH!!

I am really happy with how it turned out, too. This is the wall opposite the door so every time I walk by her room I will get a glimpse of it. I like the idea of an accent wall, so you get something special in a room without being completely overdone.

 Also, in case you didn't notice, her bedspread has little polka dots on it, too. That's why when I saw the polka dot stencil I had to get it for this room!

The view from the opposite corner.
I love how easy this was and it was done in no time, once I made time to do it of course. And like I mentioned, I have some more wall stencils, so hopefully I can find some more time to do those to give my rooms a little more character!

Friday, March 4, 2016

Jill Can Cook: Jalapeno Popper Dip

Does anyone else have 30,000 friends on social media that CONSTANTLY share those food making videos from websites like Tasty or Buzzfeed or is it just me?

I'm not even exaggerating; I have about 20 friends that share the videos and several more that share food recipe links. I also have several friends that share pictures of food they've cooked or ordered out at any given time. I check my social media throughout the day and I feel like I'm in a constant state of raging cravings with all the stuff I see.

Do you know how tough it is to diet when I'm bombarded with pictures and videos of fattening food all the time?!

I'm not complaining. Please keep sharing food stuff. As it happens, once in a great while, someone will share something that I may not have come across otherwise. Like the recipe I'm showing you today. (Thanks, my-friend-in-real-life Bob!)

I had a party coming up and wanted to make a new appetizer. Before I even so much as thought about checking out my saved appetizer recipes online, a friend (First my-friend-in-real-life Bob and then 2 more!!) shared a video for this Jalapeno Popper Dip. It caught my eye. It looked easy, yet rewarding. I asked my fellow partygoers (my family, mostly), if they'd eat it. 80% of them said yes.

Here goes:


Jalapeno Popper Dip

Adapted from: Spend With Pennies


Ingredients:


  • 1 4oz can diced jalapenos, well drained OR 4-6 fresh jalapenos, roasted and diced (include seeds if you like it really spicy)
  • 1 8oz package cream cheese, softened
  • 1 cup sour cream
  • 2 cups shredded cheddar cheese
  • ¾ cup + ¼ cup shredded parmesan cheese
  • 1 cup Italian seasoned bread crumbs
  • 4 tablespoons butter or margarine, melted
  • 1 tablespoon dried parsley
Directions:

  1. In a mixer or by hand, combine cream cheese and sour cream.
  2. Add cheddar cheese, ¾ cup parmesan cheese, and diced jalapenos, mix well.
  3. Spoon into 8x8 baking dish, spreading evenly.
  4. Blend bread crumbs, melted butter, ¼ cup shredded parmesan cheese, and dried parsley, using a fork or your fingers, until crumbly.
  5. Sprinkle the buttery crumb topping evenly over the cream cheese mixture.
  6. Bake at 375 degrees for 15 minutes, or until hot and breadcrumbs are golden brown. Do not overcook.
  7. Serve with bread or crackers.
As I said in the beginning of this blog post, I originally found this recipe by watching a quick, less than a minute long video. There was no way that I was going to be able to remake the recipe by rewatching the clip, so I found a similar recipe online to follow along with.  

Anyway, if I wanted to make this like the video, I needed fresh jalapenos. So, I grabbed 6 of them...

I have never cooked with jalapenos before. I hope I don't screw them up!

I cut them in half and broiled them in the oven for 5-10 minutes. Just long enough to make the skin dark. Then I pulled the dark part off, cut them up and put them aside.

I cut them up and pulled all the seeds out.

I decided to not make this too spicy so I chucked all the seeds. That was probably a bad idea because the dip ended up being not spicy at all. If you make it, consider keeping some of the seeds to keep it from being too bland.

All the cheese getting ready to get mixed.

The cheese all mixed together. It's starting to look pretty good!!
In the interest of not making tons more dishes for myself, I mixed the cheeses with a fork as opposed to a mixer. It wasn't hard.

Quinn wanted to watch every step of the process.

Then I added in the seedless jalapenos and spread it into a baking dish.

The bottom layer of cheese/jalapenos.
I melted the butter, mixed it with the breadcrumbs, then added that layer on top of the other.

The dip with the breaded topping.
Unfortunately, this is where the pictures end as far as the dip is concerned. I brought it to my parents party, cooked and served it and didn't take any other pictures of it. 

Anyway, I got to the party early enough so that I could precook this, but my mom was using her oven as a warmer so it was on a very low temp so the bread topping didn't get as brown as it should've. The cheeses ended up getting all melty and warm, just not the top. 

And as I'm writing this, I realize that I forgot to add the extra parmesan cheese into the bread crumb topping. Hmm. I wonder if the lack of extra cheese and failing to crisp the top is what made this dip somewhat lackluster? Obviously, the missing seeds made it less spicy, but it was kind of boring overall as far as I was concerned. Everyone seemed to like it and eat it, but by the time dinner was ready to be served, I noticed that only half the dip had been eaten. Usually the dips are gobbled up by anyone within a 10 mile radius. 

I think I may have to do a re-do on this one to be completely sure it was a bust. Or maybe one of my 4 readers (that's you!!) will take a stab at it and tell me if it really is the best dip on earth.

And just because I love taking/sharing pictures, here are a few from the party:


My dad made a frame for no-idea-why, so I put my grandparents in it for a photo op.

Joe specifically picked his shirt to match my $5 dollar dress! He's so cute.

Most of us wore some type of red. Here's my niece, Jazmyn, with my sister in varying shades. And bonus, Jazmyn's mother, my other sister, is right behind her!

Joe with my brother. This is the pose I get when my direction is: "Act like you're talking to eachother and aren't posing for a picture."

Oh and don't forget, I made something else for the party, so I'll share some more pictures on my next recipe post!

Monday, February 29, 2016

DIY: Oversized Shirt Into Fitted Peplum Top

I posted my last refashion about 5 months ago. Why has it taken me so long to post another, you ask. Mainly because I stopped looking for stuff to refashion. The new thrift store I frequent offers lots and lots of clothing items that are already perfect. But I was dying to make something mine again!

So, the past couple of weeks, I've been trying to look for a shirt of some sort that was a couple sizes too big so that I could work some magic on it. That's when I came across this little number:

Mitchell wanted to be in the picture with me. And I have a crazy hair!

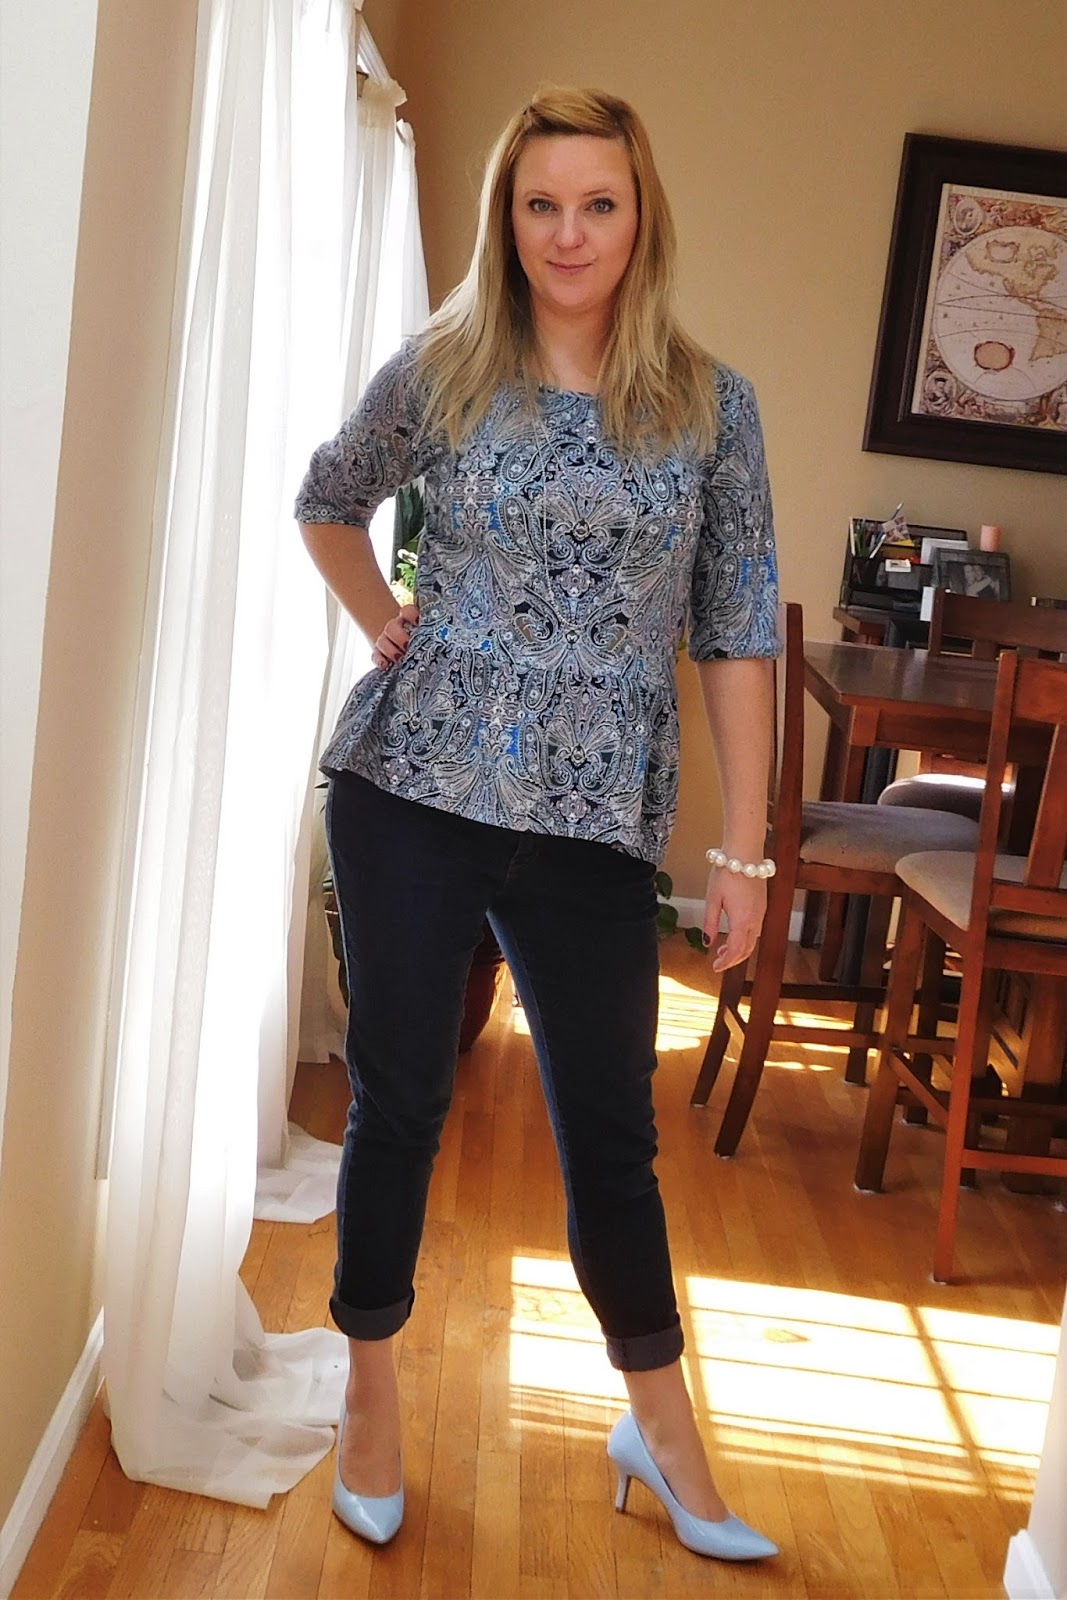
It's this really colorful paisley-esque pattern. I hit the jackpot when I snatched this shirt up for $0.30!

Judging from the tag, it was from Kohl's. The pattern was kind of old ladyish, but that was what I loved about it. It was going to be an eye catcher: A modern shirt with an unexpected pattern!

I look like a fabulous Christmas tree!
On to the re-imagining!!

WAIT!!! I want to brag for a second. You know how I was always telling you that I needed to stop forgetting to purchase pinking shears?!

I finally effin' bought a pair! Woo hoo!

Ok, brag over. Back to this shirt!

The boring inside of the shirt.

So, I flipped the shirt inside out. I planned on turning it into a peplum, 3/4 length sleeve top. So I got to cutting:

5 inches off the arms and 9 inches or so off the bottom.

Then I tried it on to figure how much I'd need to take it in in order to make it fit nicely.

I measured and pinned about 4 & 1/2 inches on the sides and about 3 inches in the arms.

Then I sewed the arms and bodice where I pinned.

I also got a new kitchen set since the last time I had my sewing machine out! Worked great with the new set up!

I also needed to sew up a new cuff (or hem or whatever) on the arms. I just eyeballed it and did not pin or measure. I'm a rebel!

I lucked out in that my laziness still yielded perfect results.
OK, this is the dreaded part where I'd need to reattach the bottom to the top.

I've done this before on a dress, but it was so long ago (and only once) that there was some trial and error during the pinning process this time, but I made it happen.

Ohh joyous moment! I can feel how good this is turning out already!

My last bit of sewing and a slightly better shot of my table!

And that's it! I got this project done in hardly any time at all! I think one thing that majorly helped was that I couldn't find my tripod in order to take my before and after shots. It takes a lot of time to wait the 10 seconds between hitting the shutter and the camera taking the pictures because I always want to take 15 or so pictures to ensure I have one that doesn't suck.

Without the tripod, I used the next best thing: Quinn. And she just captured picture after picture in such quick succession! Thanks, kiddo!  It was fun to work together, little helper!

And here it is:

My eye ball looks weird. Don't look at it!

I am really happy with how the shirt turned out!! I even had these perfectly matched light blue heels to wear with it!

My blog wouldn't be complete without a picture of me with a double chin!
I think this is my first refashion that I've gone into knowing exactly what I wanted to turn my garment into . It's also the first refashion that I can wear with the current state of the weather!

This angle makes me look really thin! Score!

I'm ultra, mega pleased with how this turned out. I'm on the fence on if I should've made the bodice and sleeves a bit tighter or not. I'm kind of thinking it's better a little looser. It feels more comfortable that way.

I hope I can keep the momentum going and do a couple more refashions in the upcoming months for you guys!  Hope you enjoyed it ask much as I did!


Friday, February 19, 2016

Jill Can Cook: Oven Roasted Kielbasa & Potatoes

It's no secret that I love kielbasa. I always thought I hated it when I was a kid. I never looked forward to it when my mom would make it for dinner. I rarely ate it.

And then one day my grandfather sliced some kielbasa up, marinated it in barbeque sauce and threw it on the grill. I don't even know why I grabbed one since I hated them so badly. But I did try it and I realized: I didn't hate kielbasa! I just hated how my mom cooked it (she boiled it. I think she still does to this day). From that day forward, I was in love. But only not boiled kielbasa.

My only problem now is that Joe, my husband, is not much of a fan. Boiled, grilled, whatever method of cooking, he'll eat it, but he's not very thrilled. I've gotta get this guy on board somehow. I found this recipe and I'm hoping it'll be the turning point for Joe!!

Oven Roasted Kielbasa & Potatoes


Adapted from: Recipes From The Big Blue Binder

Ingredients:


  • 1 package of smoked sausage (Peel if necessary, and slice into rounds)
  • 1 large onion, peeled and chopped
  • 5 large potatoes, peeled and chopped into 1/2 inch cubes
  • olive oil
  • fine sea salt
  • freshly ground black pepper
  • sweet paprika
  • dried thyme
  • a handful of grated strong cheddar cheese

Directions:

  1. Preheat the oven to 400*F.
  2. Line a large baking tray (with sides) with several sheets of foil, and drizzle with a bit of oil. Spread the oil out over the pan. Set aside.
  3. Put the sausage rounds, onions and potatoes into a large bowl.
  4. Drizzle with a couple TBS of olive oil and season to taste with salt, pepper, paprika and dried thyme.
  5. Toss together with your hands until everything is evenly distributed.
  6. Pour this out onto the baking tray, and spread it out as much as you can.
  7. Place into the heated oven and roast for 45 minutes to an hour, stirring every 15 minutes or so, until the potatoes are golden brown and tender.
  8. Turn off the oven. Scatter the cheese over top of the cooked meat and potatoes,
  9. Pop back into the oven a few minutes to melt the cheese. Serve immediately.
If you read the ingredients and saw the picture of my ingredients, you will notice a bit of a difference. That is because I used half as many potatoes (and half an onion since I'm not a huge onion lover). I knew my kids would eat the kielbasa, but I didn't think they'd eat the potatoes. They're weird about potatoes that aren't french fries. Anyway, I didn't want to have tons of potatoes leftover.

My foiled pan. I just tossed everything together in the pan instead of dirtying an additional bowl.

I only used 3 medium sized potatoes and look at them all!! 

Look at all that melty, cheesy goodness!

This seemed like a pretty straight forward recipe. I wasn't reinventing these ingredients, I was just putting together stuff that I'd otherwise have cooked separately. I didn't have the highest hopes that this would be the best food ever made I only hoped it didn't suck.

My portion.. Doesn't look like much but it was very filling.
I am on the fence as far as this recipe goes. It was easy to put together. It tasted good, although it was kind of bland. I ate my portion gladly. Joe went back for seconds and finished the pan. But really, making the dish this way didn't save me time or come out any better than had I made it separately. I think I would've preferred it separately, as the kielbasa didn't have that sear that I love so much.

I'm also really glad that I didn't make 5 potatoes. Quinn barely ate the 5 little pieces of potato I gave her and Mitchell didn't eat any of it. (To come to his defense: He ended up getting really sick the next day, so maybe it wasn't that the dish wasn't enticing, but rather he was already somewhat sick).

So, I'll give it a B. There's nothing inherently wrong with the recipe, but if I'm going to cut up potatoes and kielbasa, I'd prefer them cooked differently. I guess there's really no right or wrong.  I told my mom about the recipe and she made it for my dad for dinner. They both loved it. 


Wednesday, February 17, 2016

Jill Can Cook: Chicken Salad Sandwich

Sometimes, I am just in the mood to try out a new recipe with no requirements other than the fact that I've never made the recipe before. That's how I chose this recipe. I woke up one morning knowing that I had to meal plan and grocery shop that morning. So, I went online and sifted through my millions of dinner dish pins on Pinterest. After a long time of searching, I got to the bottom of my folder, my oldest pins ever, and there this recipe was.

Joe likes chicken salad. I like chicken salad. We would both need to eat food for lunch and instead of buying deli meat/making leftovers or (God forbid!!) buying a $10 sandwich on the go (or a $5 slice of pizza!! Why is fast food so expensive!!?!?!?!). I saw this recipe and knew it could be whipped up in a jiffy.

Before I get going, I want to mention a few things:
  1. This recipe was originally supposed to be a copycat of Panera Bread's chicken salad
  2. I've never been to Panera Bread or have eaten their chicken salad.
  3. The recipe is a copycat of an older recipe and the recipe Panera uses has since changed.
  4. I am not following the recipe exactly. So, don't go to Panera Bread thinking you're going to have a chicken salad sandwich AT ALL like mine.
Anyway, I'm sorry this whole recipe is a huge lie. I just want some yummy chicken salad!

My "It's Nothing Like Panera Bread's" Chicken Salad Sandwich 

Adapted from:
Panera Bread At Home


Ingredients:


  • 1-1/2 lb boneless skinless chicken breast
  • 2 celery ribs, chopped
  • red onion, chopped
  • lettuce
  • mustard (I used honey dijon because I hate yellow mustard)
  • onion powder
  • garlic powder
  • pepper
  • salt
  • 1 teaspoon lemon juice
  • 1 cup mayonnaise 
  • 1 1/2-2 tablespoons granulated sugar
  • sliced white bread 

Directions:
  1. Butterfly chicken.
  2.  Season both sides of the chicken with garlic and onion powder. 
  3. Heat oil in a saucepan on medium heat.
  4. Add chicken to saucepan. Cook until chicken is cooked through.
  5. Set the chicken aside and let cool.
  6. Chop the celery, red onion, and the cooled chicken and set in a bowl.
  7. In another small bowl add mayo, sugar, pepper, salt lemon juice and whisk until well combined. You want the sugar to disintegrate so that you're not tasting the grain.
  8. Mix the mayo mixture with the chicken, celery, and onion mixture.
  9. Take a slice of bread (or wrap or pita pocket) and add any extra fixings you like (like lettuce, tomato, etc).
  10. Top with the chicken salad and another slice of bread.
  11. Enjoy!

I made this dish when Joe was home and for the life of me, I couldn't get him to help me with one step! I was feeling quite lazy and would've loved the help, but I powered through, all on my own, because I love you guys (all 3-4 of you brazilians and russians!). You guys deserve the best and I hope, for once, I can give you the best... Onto the pictures!!

I cooked that chicken like a boss!

I got a new knife recently. It made the celery and red onion chopping go by so fast!!

The mayonnaise sauce was so creamy and smelled enticing!

I mixed the chicken, celery, and onion together before I added in the sauce just to make sure everything was evenly distributed.

The finished product, minus the bread.
I started making this a little later than I planned. I'd wanted to have it for lunch that afternoon, and by the time it was mixed, it was past lunch time so I was starving and dying to eat.

Let me just stop right here to say: It was very enjoyable but... It was more enjoyable the next day, after it had been refrigerated (as opposed to room temperature that first time I ate it) and also after the flavors had a chance to marry. So, keep that in mind if you decide to make it.

Joe picked out the best lettuce! 
I didn't realize that this recipe would yield so much chicken salad! Joe and I each had a sandwich that day. I had two more sandwiches over the course of the next few days. Joe had one more sandwich and then ate the rest without any bread (no idea why, but he said it was really good like that, too!).

I even perfectly toasted that bread!
I didn't even try to give any of this to the kids. I gave them grilled cheese sandwiches or pb&j sandwiches on the days that I ate the chicken salad. I'm sure they appreciated it. They aren't very adventurous eaters. 

Mmmm... 
Joe makes a really great chicken salad as well, but I like this one better. Joe prefers anything he doesn't have to cook. I think we'd both give this recipe an A+, especially when it came to the flavor of the leftovers! I'm also glad I finally made something that I'm proud to share with you guys! So hurry up and make it and let me know what you think!